

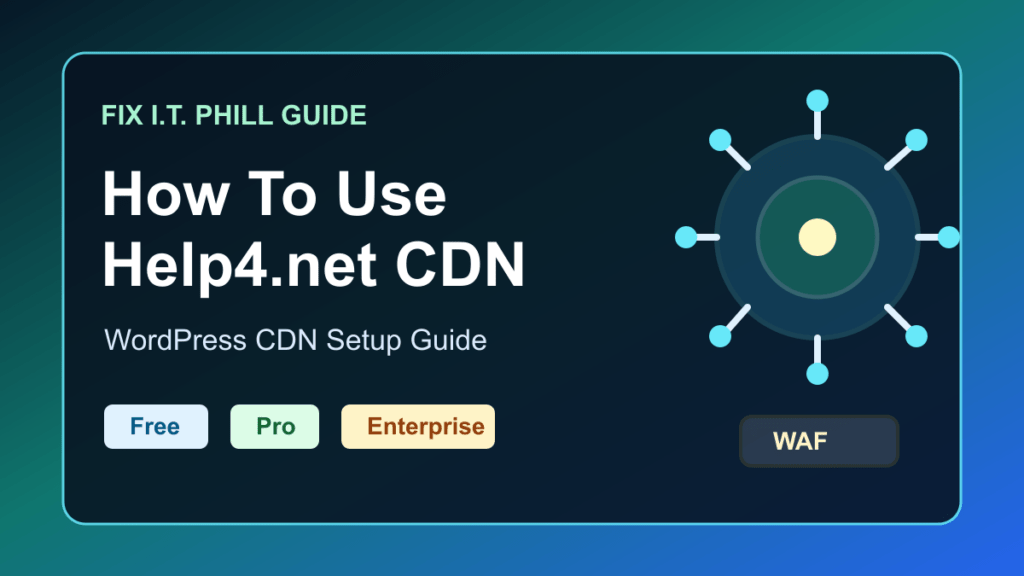
Help4.net CDN gives WordPress site owners a practical way to improve delivery speed, reduce origin load, and choose the right level of CDN control without rebuilding the whole hosting stack. This guide walks through the Free, Pro, and Enterprise paths, what to cache first, and how to validate the setup with simple performance checks.
If you want to start now, visit Help4.net and choose the CDN plan that matches how much cache, POP control, and edge security you need.
Why Help4.net CDN Matters For WordPress
Most WordPress owners do not need to rebuild their entire website to get a faster first impression. They usually need static assets delivered closer to visitors, fewer repeat requests hitting the origin server, safer cache rules, and a clear fallback path when the site needs more capacity.
- Faster static asset delivery: images, CSS, JavaScript, logo files, and shared theme assets can be served from CDN cache.
- Less origin load: repeated requests do not have to keep waking up Apache, Nginx, LiteSpeed, PHP-FPM, or WordPress.
- Safer cache behavior: public files can be accelerated while carts, accounts, checkouts, and logged-in sessions stay protected.
- Simple scaling path: start with Free, move to Pro for more capacity and POP flexibility, then use Enterprise when full proxy and deeper controls are needed.

Free vs Pro vs Enterprise
| Plan | Best use case | Practical expectation |
|---|---|---|
| Free | Starter acceleration and safe testing | Use it to prove the setup, offload basic assets, and confirm nothing breaks. |
| Pro | Active WordPress businesses | Use it when you need more storage, more POP choices, and stronger operating controls. |
| Enterprise | Full proxy and advanced security/WAF path | Use it when CDN behavior, security posture, and broader edge control need to be managed together. |
Quick Start For WordPress
- Download and install the Help4 CDN plugin.
- Connect your WordPress site and choose your plan mode: Free, Pro, or Enterprise.
- Select the first asset groups to offload: images, CSS, JavaScript, and selected page elements.
- Pick your POP strategy. Free and Pro use the available POP slots for the plan, while Enterprise is the full coverage path.
- Save settings and run the first sync.
- Purge and warm cache once, then verify the browser loads assets cleanly.

What To Cache First
For the safest first win, cache public assets before you cache pages that can change per visitor. Static delivery is where most WordPress sites can improve performance without risking account, cart, or checkout behavior.
- Homepage hero images.
- Shared CSS bundles.
- Shared JavaScript bundles.
- Logo and brand assets.
- Product images.
- Blog archive visuals.
Keep dynamic account, cart, checkout, search, and session traffic on origin unless you are using a tested full-proxy configuration and have verified the edge rules with real checkout and login flows.
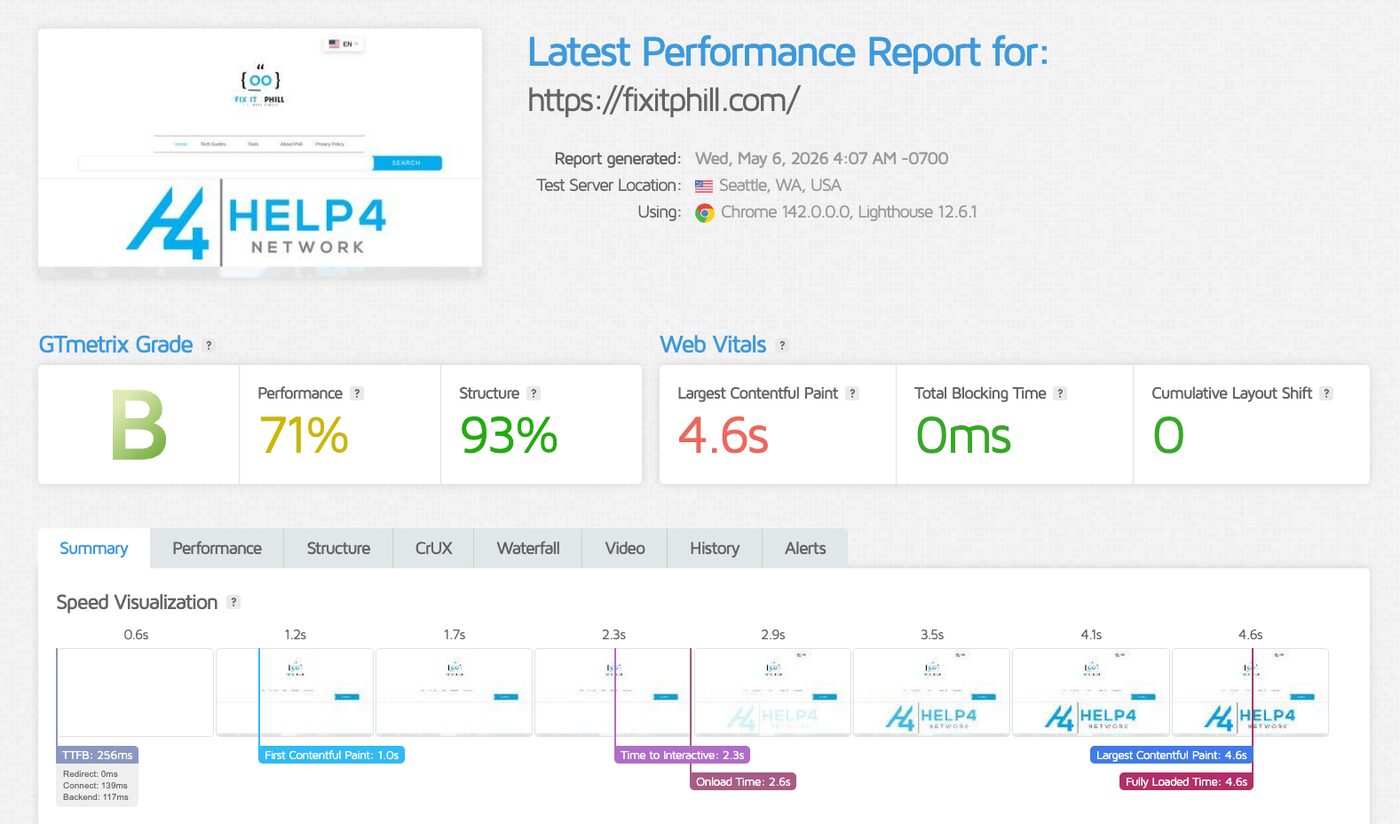
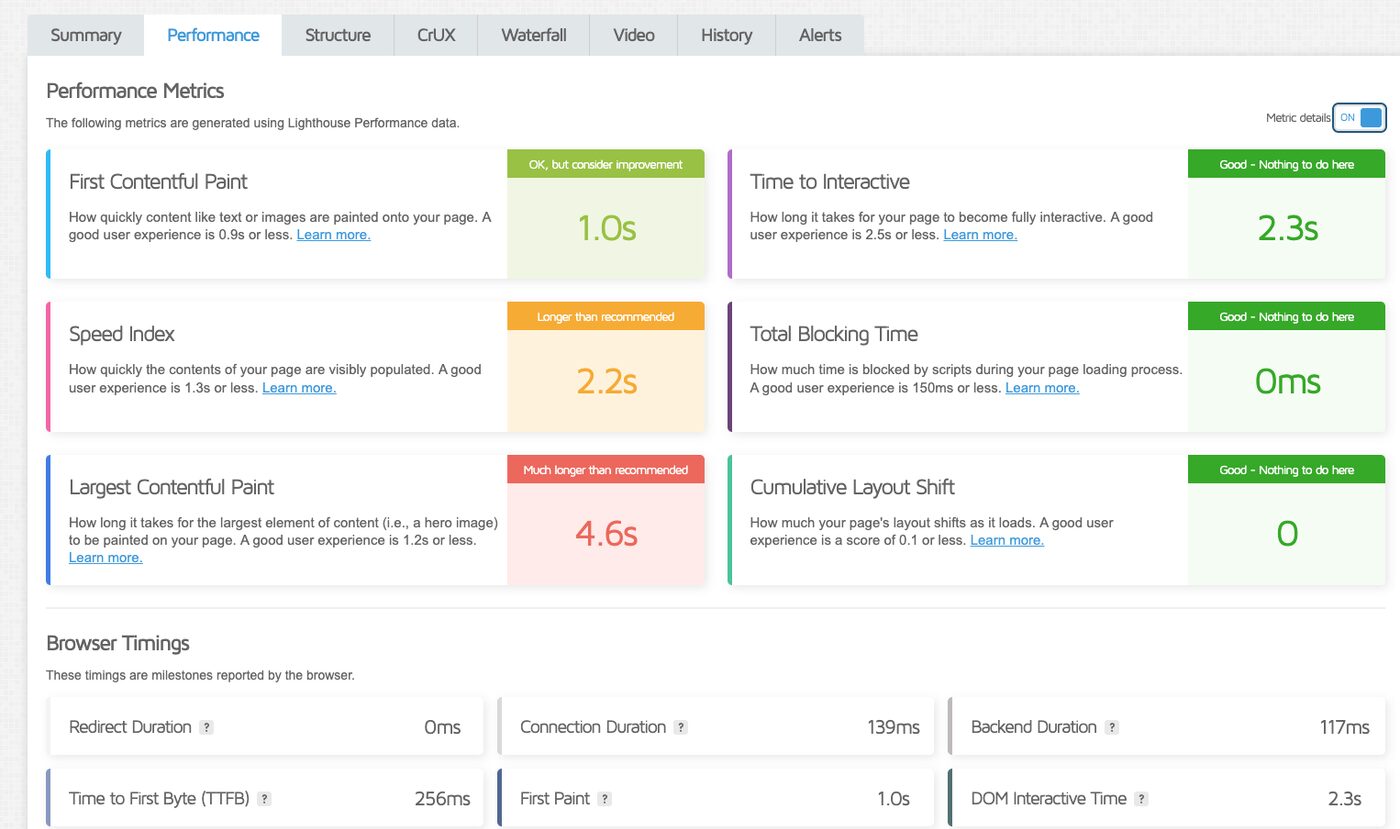
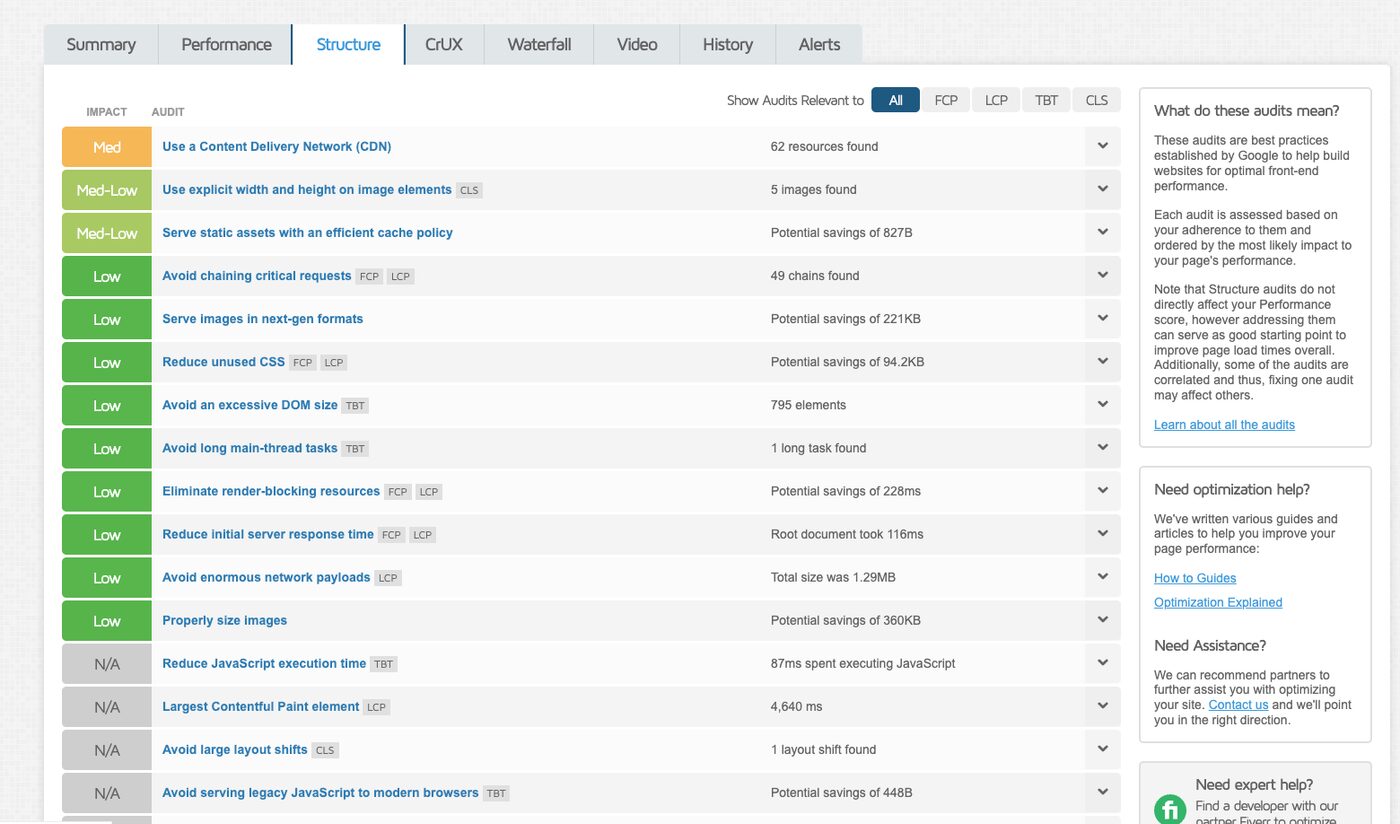
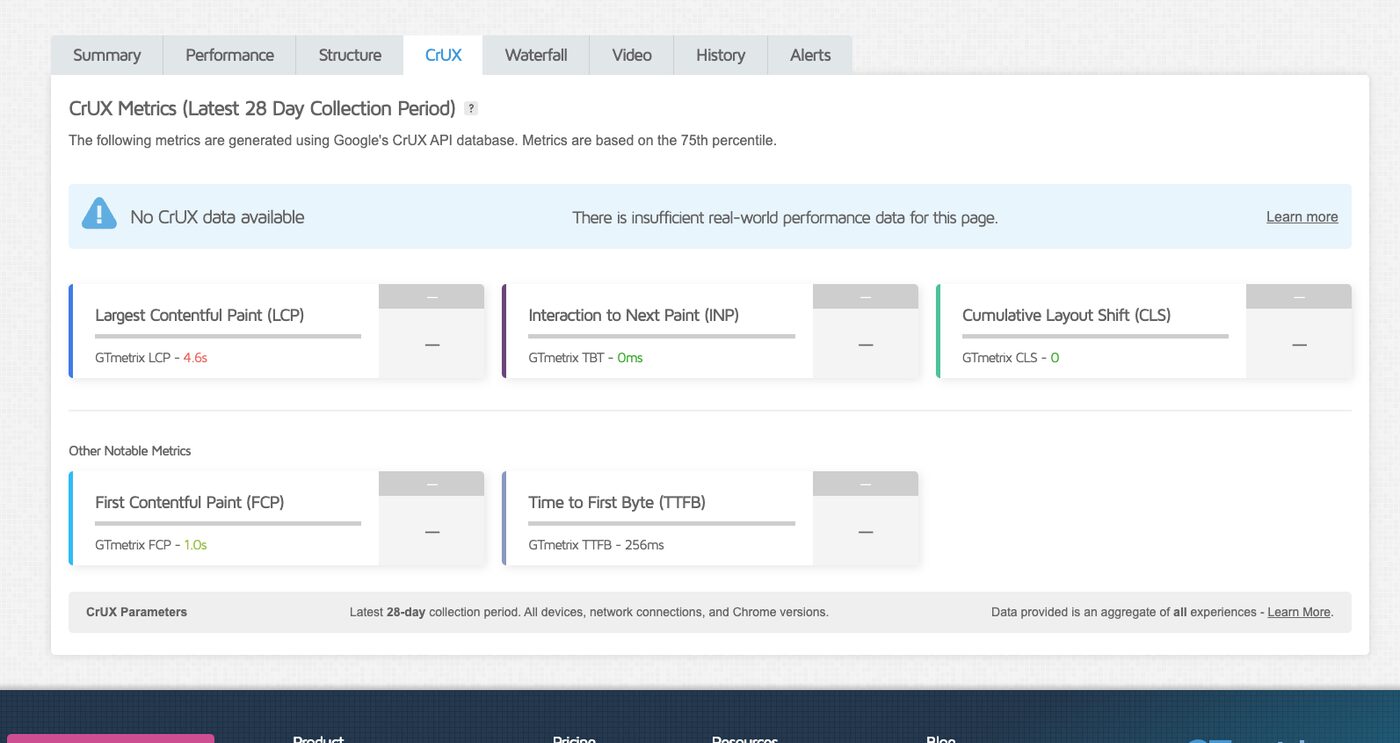
Performance Check Workflow
- Run a GTmetrix or Lighthouse test before changing CDN settings.
- Turn on the first CDN asset group and run one purge/warm cycle.
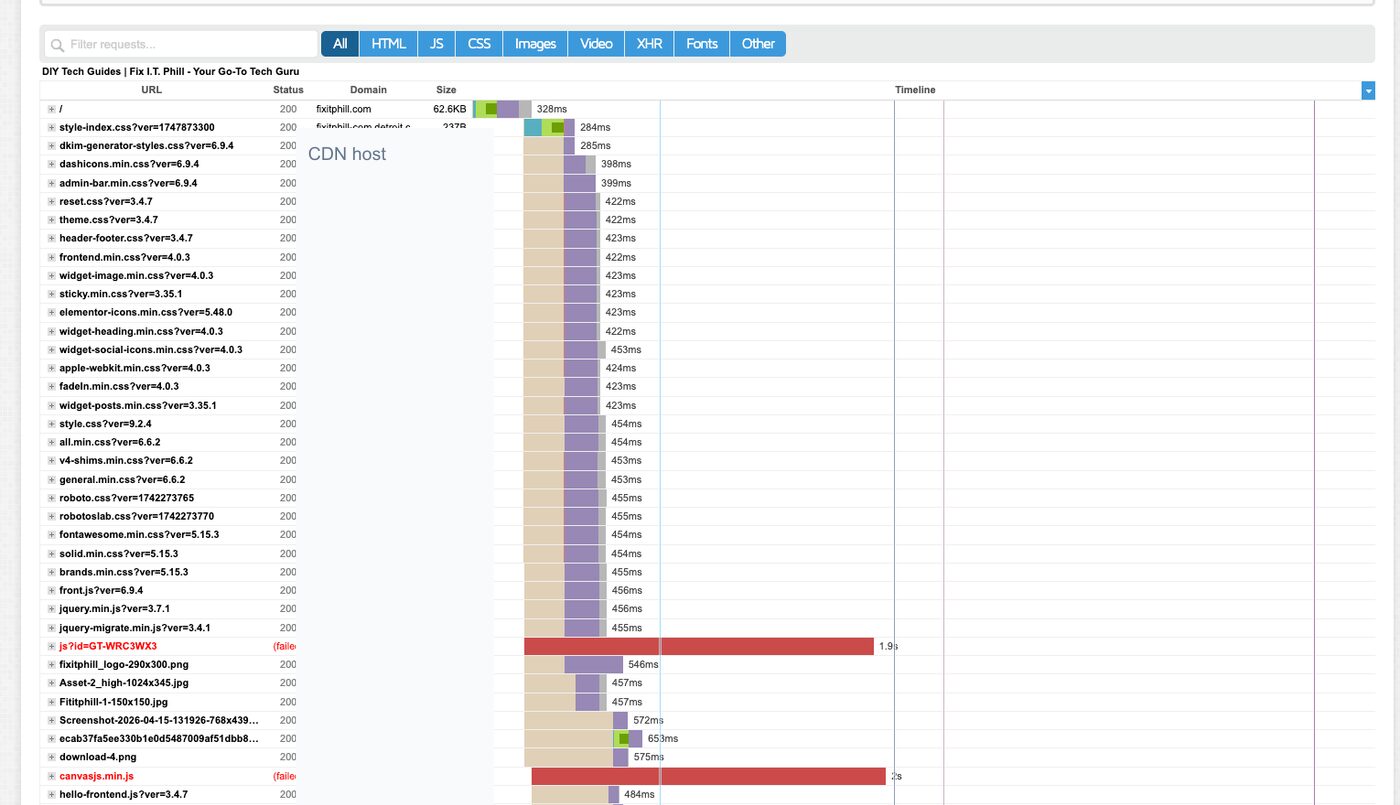
- Check waterfall results for static files loading from the CDN path.
- Verify cache headers on images, CSS, and JavaScript.
- Open the public site in a clean browser session and confirm no broken media, mixed-content warnings, or checkout issues.
- Repeat the test after theme, plugin, or major content changes.

Common Setup Mistakes To Avoid
- Caching dynamic pages too early: protect carts, checkouts, accounts, admin pages, and logged-in sessions first.
- Forgetting to purge after updates: theme and plugin updates can leave old CSS or JavaScript cached until you purge the affected paths.
- Turning on broad rules before testing: enable one group, verify it, then move to the next.
- Ignoring source image quality: CDN delivery helps speed, but oversized source images still need resizing and format optimization.
- Only testing the homepage: test a post, a category archive, a product page, and any contact or checkout path that matters.
When To Upgrade
Start with Free when you want to prove the workflow and confirm that CDN delivery does not change site behavior. Move to Pro when the site has steady traffic, more media, or a real business reason for more capacity and POP flexibility. Choose Enterprise when you need the full proxy path, deeper security controls, and a more managed edge posture.

Final Recommendation
Use Help4.net CDN in stages: cache obvious public assets first, validate the waterfall, watch real-user behavior, then increase coverage once you trust the setup. That gives WordPress owners a cleaner path to speed without gambling with checkout, login, or customer sessions.
Learn more and get started at https://help4.net/.
Sources
- Help4.net CDN plans and setup path
- Local Fix I.T. Phill GTmetrix CDN validation screenshots from May 6, 2026.