

Payment keys are where a lot of WordPress store launches quietly go wrong. The beginner mistake is simple: people paste live credentials into a store they have not tested yet, or they leave test credentials in place after launch. This Razorpay guide walks through the clean path: create the test or sandbox keys first, put them into the WooCommerce payment plugin, run a safe test order, then switch to live credentials only when the checkout flow is confirmed.
Open the official docsPayment tutorial hub

What You Are Setting Up
- Razorpay API credentials are a Key ID and Key Secret.
- Razorpay has separate Test Mode and Live Mode credentials.
- The Key Secret is shown when generated and must be stored securely.
- The WooCommerce plugin uses the Key ID and Key Secret to connect checkout to Razorpay.
Before You Touch Any Keys
- Update WordPress, WooCommerce, and the payment gateway plugin first. Key problems are harder to debug on an outdated plugin.
- Make one low-priced test product, such as a one dollar checkout product, so you can test without disturbing the real catalog.
- Use a staging site or maintenance window if the store already takes orders.
- Keep secret keys in the WordPress admin field or a proper secret manager. Do not paste live secret keys into tickets, chats, screenshots, or public docs.
- Confirm the checkout page, cart page, SSL certificate, permalinks, and transactional emails before going live.
Create Test Or Sandbox Credentials
- Log in to the Razorpay Dashboard.
- Switch the dashboard to Test Mode.
- Open Account & Settings > API Keys.
- Generate the Test Mode Key ID and Key Secret.
- Store the Key Secret securely because only the Key ID remains visible after generation.
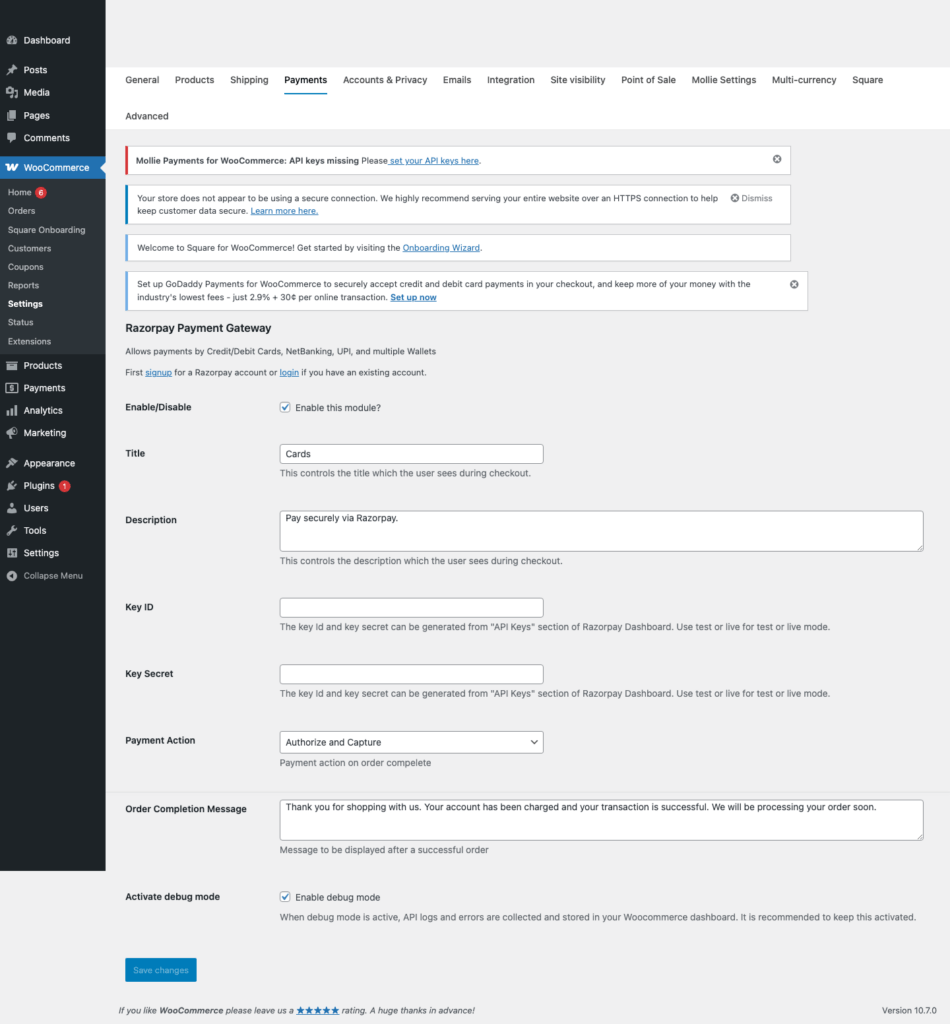
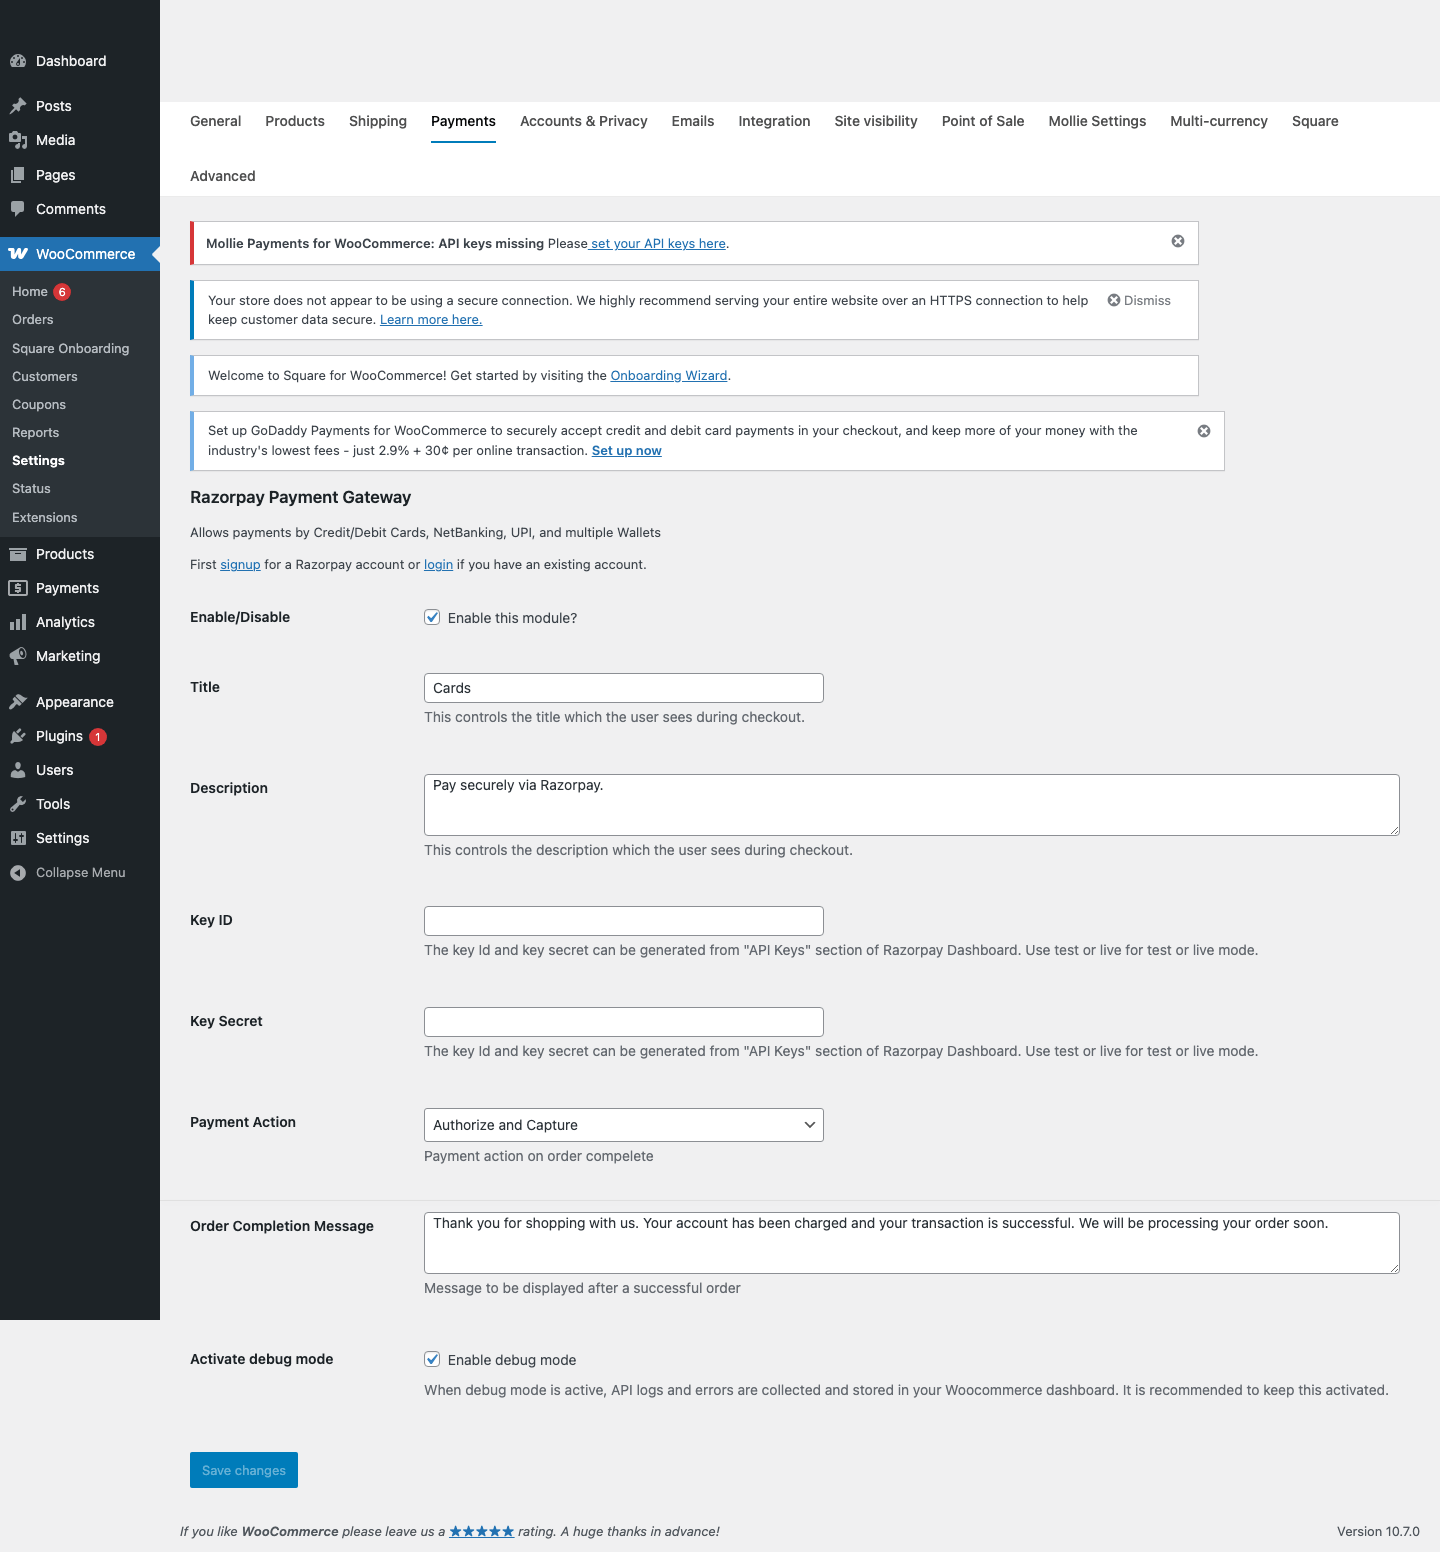
Add The Test Keys In WordPress
- In WordPress, open WooCommerce > Settings > Payments.
- Open Razorpay.
- Enable the payment method.
- Paste the Test Mode Key ID and Key Secret into the plugin settings.
- Save changes and verify the Razorpay payment option appears at checkout.
Run A Safe Test Order
- Add the test product to the cart and choose Razorpay at checkout.
- Use one of the Razorpay test cards or test UPI IDs below.
- On the mock payment page, choose Success to test a paid order.
- Run a second test and choose Failure to confirm WooCommerce handles failed payments correctly.
- Confirm the test payment appears in the Razorpay Dashboard while in Test Mode.
Demo Cards And Test Values
| Scenario | Test value | Use it for |
|---|---|---|
| Domestic Visa | 4111 1111 1111 1111 | Razorpay test-mode card checkout. |
| Domestic Mastercard | 5267 3181 8797 5449 | Alternative domestic card test. |
| International Mastercard | 5555 5555 5555 4444 | International card test path. |
| UPI success | success@razorpay | Successful UPI test. |
| UPI failure | failure@razorpay | Failed UPI test. |
Switch To Live Payments
- Complete Razorpay account activation and any required approvals.
- Switch the Razorpay Dashboard to Live Mode.
- Open Account & Settings > API Keys and generate live keys.
- Replace the Test Mode credentials in WooCommerce with the Live Mode Key ID and Key Secret.
- Run a controlled live verification and confirm the payment is captured or authorized according to your payment action setting.
Common Mistakes To Avoid
- Using test keys while the business expects live payments.
- Using live keys while still testing the checkout.
- Not saving the Key Secret when it is generated.
- Leaving manual capture enabled without a process to capture authorized payments.
- Not checking webhook status if orders do not update correctly.
Quick Launch Checklist
- Test checkout succeeds with a demo payment method.
- Test checkout failure shows a useful error and does not create a paid order.
- Order notes show the correct processor transaction ID or sandbox transaction ID.
- Refund or void testing has been checked if the processor supports it from WooCommerce.
- Live credentials are active, test credentials are removed from production, and the store owner can see live transactions in the processor dashboard.