WordPress payment processors all have the same core problem: they give you a safe testing mode and a real money mode, and beginners need to know which keys belong where. This hub links the FixItPhill setup guides for the most common WooCommerce payment processors, with local WordPress screenshots, safe test-order steps, demo card notes, and live launch checklists.
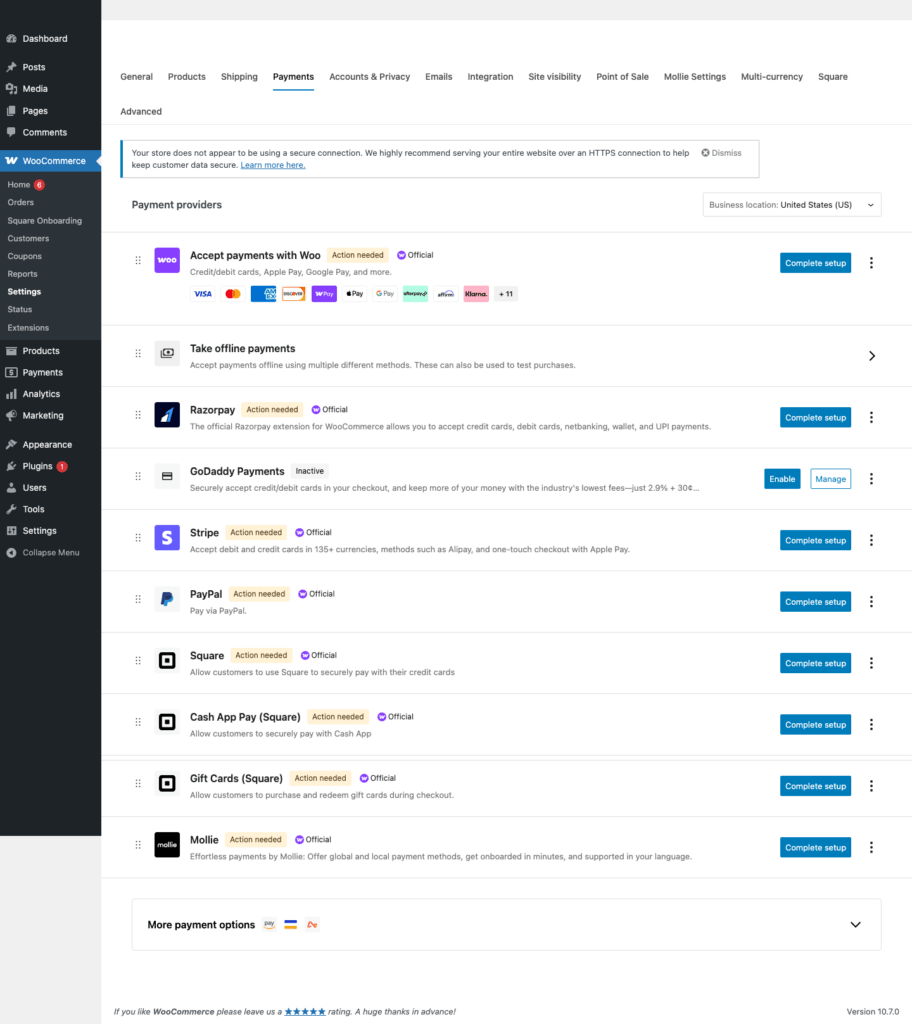
Compare the processor guidesWooCommerce payment settings

The Simple Rule
Use sandbox or test keys until the checkout flow works. Switch to live keys only after you can prove that the cart, checkout, order status, email, refund, and dashboard reporting all behave correctly. Never test a live checkout with a real customer card just to see what happens.
Published Processor Guides
| Processor | Credentials you handle | Best fit |
|---|---|---|
| Stripe | Publishable key, secret key, webhook signing secret | Card payments, wallets, subscriptions, and broad global WooCommerce support. |
| Square | Sandbox application credentials, access token, location ID | Stores that also use Square locations, catalog sync, or in-person selling. |
| GoDaddy Payments | Application ID and Private Key | U.S. and Canadian WooCommerce stores that want GoDaddy Payments inside WooCommerce. |
| PayPal Payments | Sandbox and live Client ID/Secret | PayPal wallet, Pay Later, cards through PayPal, and customers who prefer PayPal checkout. |
| WooPayments | Connected WooPayments account and test mode setting | WooCommerce-native card payments and payment management inside the WordPress dashboard. |
| Mollie | Test API key and Live API key | European and international stores that need multiple local payment methods. |
| Razorpay | Key ID and Key Secret | WooCommerce stores using Razorpay-supported cards, UPI, wallets, and Indian payment methods. |
Beginner Payment Testing Workflow
- Install WooCommerce and the payment gateway plugin.
- Create a low-priced test product and confirm the cart and checkout pages are assigned.
- Create processor test or sandbox credentials in the official dashboard.
- Paste only the test credentials into WordPress while the gateway is in test mode.
- Run one successful test order and one failed test order.
- Confirm the order status, order notes, transaction ID, email receipt, and processor dashboard record.
- Switch to live credentials only after the store owner, developer, or support team can repeat the expected result.
Next Processor Wave
The current tutorial set covers the processors most likely to show up first on WooCommerce stores we support. The next processor wave should include these vendors so FixItPhill can keep building topical authority across WordPress payments.
- Authorize.Net
- Braintree
- Amazon Pay
- Klarna
- Afterpay/Clearpay
- Affirm
- Adyen
- Worldpay
- 2Checkout/Verifone
- Payoneer Checkout
- Opayo/Sage Pay
- NMI
- CyberSource
- Clover
- Moneris
- Elavon/Converge
- Paystack
- Flutterwave
- Mercado Pago
- PayFast
- PayU
- Coinbase Commerce
Security Notes For Store Owners
- Do not email live secret keys to a developer. Use the processor dashboard, a password manager, or temporary delegated access.
- If a key was pasted into the wrong place or shared too widely, rotate it before launch.
- Keep debug logging off on production unless you are troubleshooting an active issue, and never log full card data.
- Use SSL everywhere. A payment page without HTTPS should not be taking card details.
- Review failed orders before assuming the processor is broken. Many failed orders are address, CVV, webhook, currency, or account-approval issues.