Payment keys are where a lot of WordPress store launches quietly go wrong. The beginner mistake is simple: people paste live credentials into a store they have not tested yet, or they leave test credentials in place after launch. This GoDaddy Payments guide walks through the clean path: create the test or sandbox keys first, put them into the WooCommerce payment plugin, run a safe test order, then switch to live credentials only when the checkout flow is confirmed.
Open the official docsPayment tutorial hub
What You Are Setting Up
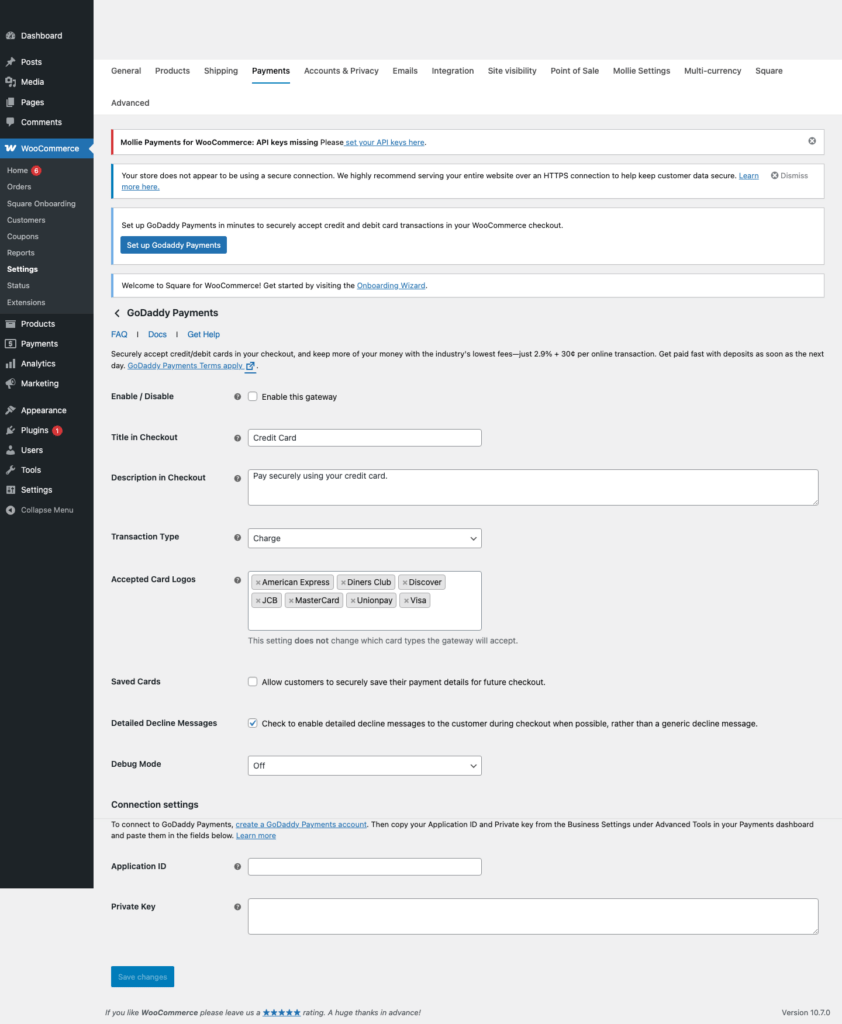
- GoDaddy Payments for WooCommerce asks for an Application ID and Private Key.
- The plugin includes live fields and staging fields for shops that have staging credentials.
- GoDaddy documentation points merchants to the GoDaddy Payments dashboard and Business Settings for these credentials.
- GoDaddy/Poynt hosted payment fields are designed so raw card data does not live on the WordPress server.
Before You Touch Any Keys
- Update WordPress, WooCommerce, and the payment gateway plugin first. Key problems are harder to debug on an outdated plugin.
- Make one low-priced test product, such as a one dollar checkout product, so you can test without disturbing the real catalog.
- Use a staging site or maintenance window if the store already takes orders.
- Keep secret keys in the WordPress admin field or a proper secret manager. Do not paste live secret keys into tickets, chats, screenshots, or public docs.
- Confirm the checkout page, cart page, SSL certificate, permalinks, and transactional emails before going live.
Create Test Or Sandbox Credentials
- Create or finish the GoDaddy Payments account setup in the GoDaddy dashboard.
- Open the GoDaddy Payments dashboard.
- Go to Advanced Tools > Business Settings > Contact Info or Business Settings, depending on the current GoDaddy dashboard view.
- Find the Poynt Collect API Settings section.
- Copy the Application ID and Private Key. If GoDaddy has issued staging credentials, copy the Staging Application ID and Staging Private Key too.
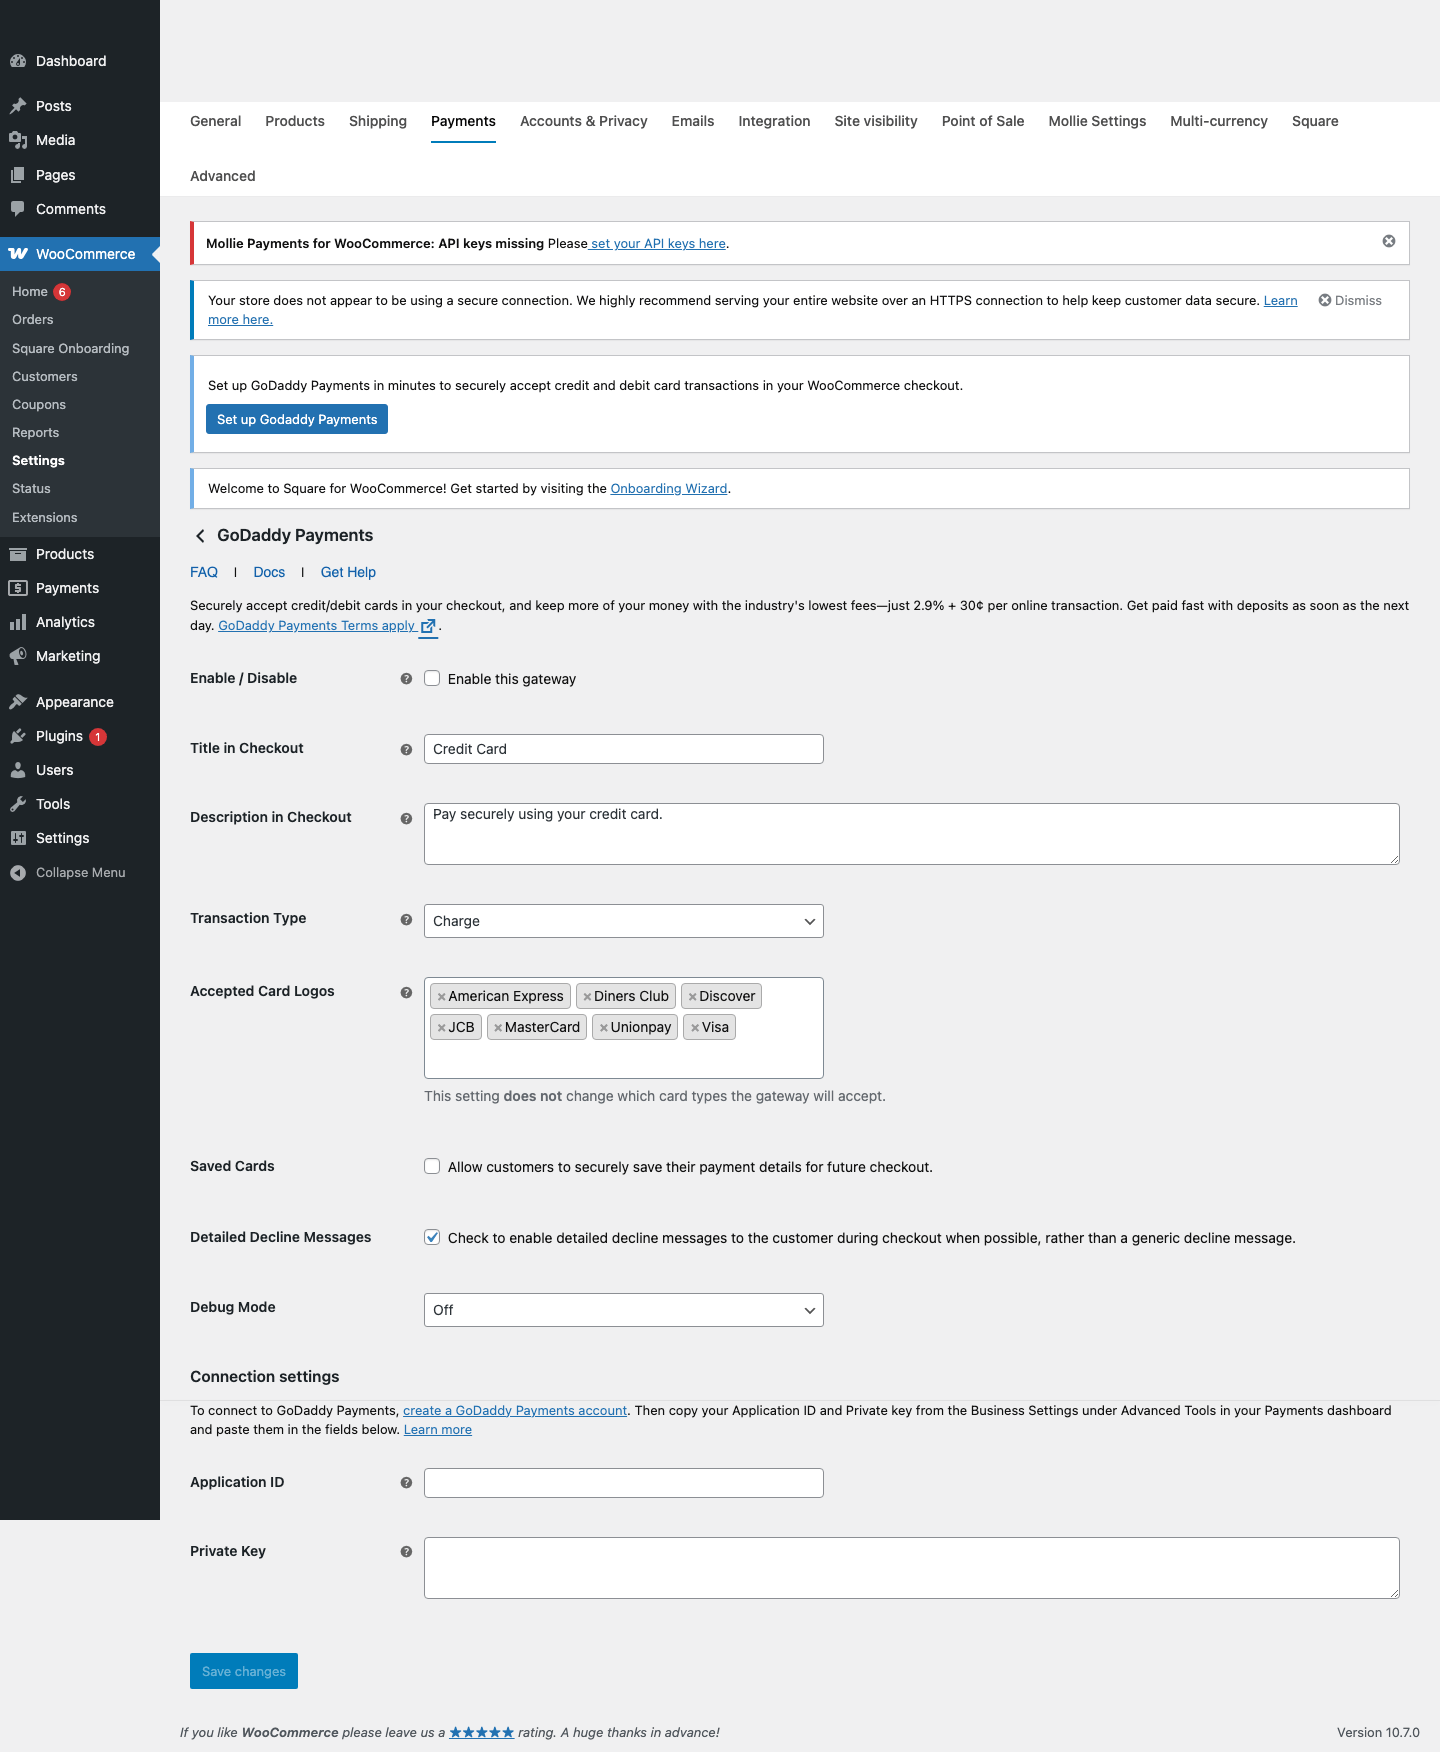
Add The Test Keys In WordPress
- In WordPress, open WooCommerce > Settings > Payments.
- Open GoDaddy Payments or Credit Card under the payment methods list.
- Paste the Application ID and Private Key into the matching fields.
- If you have staging credentials, paste the staging values into the staging fields shown in the plugin.
- Enable the gateway, save changes, and make sure the checkout page loads the GoDaddy Payments card fields.
Run A Safe Test Order
- If GoDaddy has provided staging or test merchant credentials, use those first.
- Use the GoDaddy-approved test card values shown in your staging/test merchant materials or issued by GoDaddy support.
- If you do not have staging credentials, do not guess with random processor test cards. Complete account verification first and use a controlled low-value live verification only when the merchant account is approved.
- Confirm WooCommerce order notes show a GoDaddy Payments response.
- Review WooCommerce > Status > Logs if the payment field loads but the transaction does not complete.
Demo Cards And Test Values
- GoDaddy does not publish a general WooCommerce test-card table in the public plugin listing. Use the GoDaddy/Poynt staging or test values issued for your merchant account.
- The Poynt Collect FAQ says live merchants accept real cards while test merchants accept GoDaddy-approved test cards, so the merchant environment matters.
- Do not use Stripe, Square, PayPal, or Razorpay demo cards on a GoDaddy live checkout and assume they are safe.
- For production verification, use a deliberate low-value transaction only after the account is approved, then void or refund according to GoDaddy Payments guidance.
Switch To Live Payments
- Finish GoDaddy Payments business and payout verification.
- Confirm the live Application ID and Private Key are copied from the live GoDaddy Payments dashboard.
- Enable the GoDaddy Payments gateway in WooCommerce.
- Place a controlled live verification only after business verification is complete.
- Confirm payment, order status, refund/void behavior, and payout visibility in the GoDaddy Payments dashboard.
Common Mistakes To Avoid
- Looking in the normal GoDaddy hosting dashboard and missing the Payments Business Settings area.
- Using staging fields with live merchant credentials or live fields with staging credentials.
- Assuming every payment processor accepts the same demo card numbers.
- Skipping GoDaddy Payments verification before taking real orders.
- Leaving debug mode on longer than needed after troubleshooting.
Quick Launch Checklist
- Test checkout succeeds with a demo payment method.
- Test checkout failure shows a useful error and does not create a paid order.
- Order notes show the correct processor transaction ID or sandbox transaction ID.
- Refund or void testing has been checked if the processor supports it from WooCommerce.
- Live credentials are active, test credentials are removed from production, and the store owner can see live transactions in the processor dashboard.