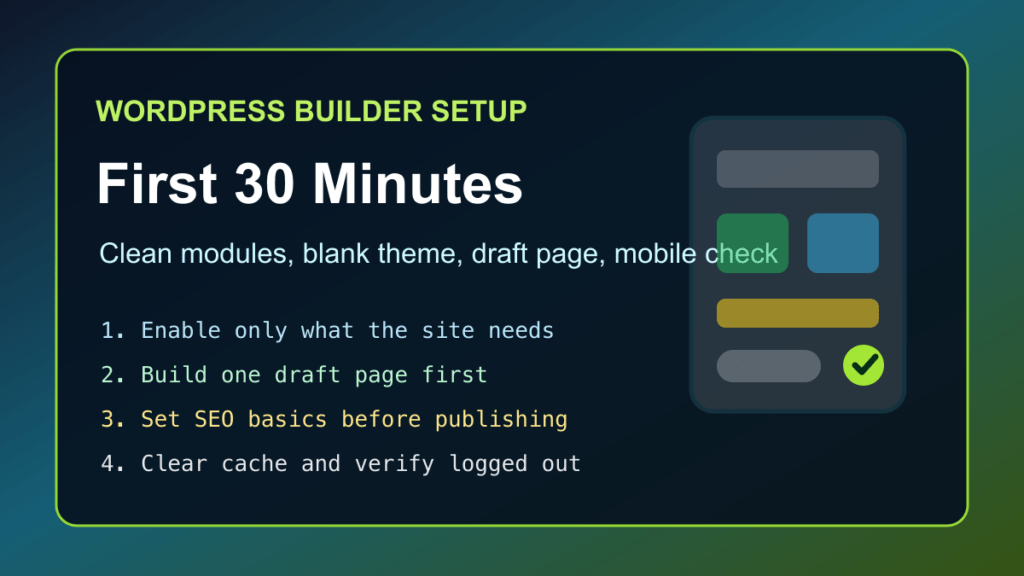
Installing a WordPress builder plugin is the easy part. The first 30 minutes after installation decide whether the site stays clean, fast, and manageable or turns into a stack of random modules, duplicate layouts, and pages nobody wants to touch later.
This is the practical setup pass I recommend before building real production pages. It works for small business sites, agency builds, service pages, landing pages, and WordPress owners who want a visual builder without inheriting a mess.
1. Run The Setup Screen Slowly
Most builder problems start when someone installs the plugin, clicks through every onboarding screen, enables everything, imports three demo layouts, and then wonders why the site feels heavy. Slow down. Open the builder settings first and look for the basics: license, modules, templates, global styles, permissions, cache behavior, and update settings.
If you are using Help4 Builder Suite, keep the Help4 Builder install tutorial open while you do the first setup pass. It gives you a cleaner path than guessing your way through the dashboard.
2. Turn On Only The Features You Need
A builder should make the site easier to maintain, not load every possible tool on every page. If the plugin lets you enable modules one by one, start small. Turn on the layout, content, button, image, form, slider, and template tools you know the site needs. Leave experimental or unused modules off until there is a real reason to use them.
This keeps the admin cleaner for the next person and reduces the chance that an unused feature becomes another thing to update, troubleshoot, or secure.
3. Start With A Blank Theme
Visual builders work best when they are not fighting a bloated theme that already controls every header, footer, button, column, and mobile breakpoint. If your goal is to build pages visually, use a blank or lightweight theme as the foundation. Then let the builder handle the layout instead of stacking builder styles on top of theme styles.
For existing sites, do not swap the live theme without a staging test. Copy the site, test the blank-theme approach, check the header and footer, and compare the important pages before making that change publicly.
4. Build One Draft Page Before Touching Production Content
Create one draft page and use it as your test bench. Do not start with the homepage. Do not start with the money page. Build a simple service page with a headline, short intro, image, service sections, trust section, FAQ, and call to action.
The goal is to learn the builder workflow safely. Test spacing, buttons, typography, image behavior, reusable sections, and responsive controls. If you are new to the plugin, follow a first-page walkthrough like build your first Help4 Builder page before touching the pages customers already use.
5. Check Mobile Before Publishing
Desktop layouts can lie to you. A page that looks polished on a large monitor can turn awkward on a phone: buttons wrap badly, images crowd the headline, columns stack in the wrong order, and forms become annoying to use.
Before publishing, check the page at mobile and tablet widths. Look for readable headings, tappable buttons, sane spacing, visible form labels, and a call to action that does not disappear below a wall of decoration. If the page is for a local business, test it on a real phone too. That is how customers will see it.
6. Set The SEO Basics Before The Page Goes Live
A builder page still needs normal SEO discipline. Before publishing, write a clear page title, meta description, and H1. Add internal links to related pages. Use descriptive image alt text. Make sure the page has one obvious purpose and one main call to action.
- Title: make it specific to the service, city, product, or problem.
- Description: explain why the page is useful and what the visitor can do next.
- H1: use one main headline that matches the page topic.
- Internal links: connect the page to related services, tutorials, pricing, contact, or support pages.
- CTA: use a real next step, such as call, schedule, request help, buy, or read the next guide.
7. Clear Cache And Recheck The Public Page
After publishing, clear the builder cache, WordPress page cache, object cache, hosting cache, and CDN cache if those layers exist. Then open the public URL in a private browser window. This catches the classic problem where the logged-in editor looks right but the public visitor still sees an older layout or missing stylesheet.
Check the public page again after a few minutes. If the site has a CDN, test the page through the public domain, not only the origin server. Search engines and customers see the public edge path.
A Simple First-30-Minutes Checklist
- Confirm the plugin is installed, active, and updated.
- Enable only the builder modules the site actually needs.
- Choose a blank or lightweight theme if the build is new.
- Create one draft test page before editing production content.
- Build a simple page structure with a clear call to action.
- Check desktop, tablet, and mobile views.
- Add the title, meta description, H1, alt text, and internal links.
- Clear cache and verify the public page while logged out.
- Only then repeat the workflow on important live pages.
Bottom Line
A builder plugin is powerful, but power is not the same as a plan. Start small, keep the module list clean, build one draft page first, check mobile early, and handle SEO before the page is published. That gives you a site that is easier to support, easier to update, and less likely to break the next time WordPress or the builder changes.
Related builder setup guide
2026 update: install the Help4 plugin and theme as separate packages
If you are using Help4 Builder Suite, treat the builder plugin and the Help4 Blank theme as two different WordPress packages. The builder plugin handles the modules, templates, fields, commerce tools, icons, SEO helpers, and page-building workflow. The Help4 Blank theme is the quiet theme shell that gives those builder layouts a clean place to run.
Before you install or update either package, make sure you have a usable restore point. A builder update can change templates, CSS, menus, and cached front-end output, so take the same care you would before changing a production theme. If you do not already have a restore plan, start with the Fix I.T. Phill guide on checking WordPress backups and restore points.
- Install the Help4 Builder Suite plugin under Plugins > Add New > Upload Plugin.
- Install the Help4 Blank theme under Appearance > Themes > Add New > Upload Theme.
- Keep the previous theme available until the home page, menus, key service pages, forms, and mobile layout have been checked.
- Build or edit a draft page first, then publish after the builder controls, SEO title, images, and cache behavior look correct.
- If a module behaves oddly after the install, use the Fix I.T. Phill WordPress plugin troubleshooting checklist before disabling unrelated plugins.
Official setup sources: the Help4 Builder Suite product page, the Help4 Builder install guide, the Help4 Blank theme ZIP, the WordPress.org plugin upload documentation, and the WordPress.org theme management documentation.
2026 update: check social images after Help4 Builder Suite 1.3.208
Help4 Builder Suite 1.3.208 adds Help4-branded social cards, a site-level Default Social Image URL setting, and stronger Open Graph image metadata when the fallback card is known. For a business site, the practical reason to update is simple: shared links are less likely to fall back to an old demo image, a blank card, or the wrong page screenshot.
Before updating a live site, keep the same builder-update routine: confirm your backup or restore point, update the plugin during a quiet window, then test the pages people actually share. The home page, a main service page, a blog post, and any WooCommerce product page are the minimum useful sample.
- Update Help4 Builder Suite to 1.3.208 or newer before judging the new social-card behavior.
- If the site needs one clean fallback image, open the Builder Suite settings and set the Default Social Image URL.
- Check the public page source for
og:image,og:image:secure_url,og:image:width,og:image:height, and Twitter image metadata. - Clear the WordPress page cache, CDN cache, and social-preview cache before deciding whether the preview image is wrong.
- If a page already has its own featured image or SEO plugin social image, verify that the page-specific image still wins where expected.
Official sources for this update are the Help4 Builder Suite product page, the Help4 Builder Suite changelog, the current Help4 Builder Suite ZIP, and the Help4 Builder install guide.